Install and connect VilaNet on Koolshare Merlin
This guide covers the public VilaNet package for Koolshare rogsoft Broadcom HND package-center firmware. It takes you from downloading the package through connecting devices on your router's LAN.
Prefer the richer visual presentation? Open the VilaNet Merlin guide for its colorful layout and diagrams. Its current CLI examples do not match the public v1.0.10 package, so use the verified package and Web UI instructions on this page until the microsite is corrected.
Physical-router verification is pending. The package, installer contract, web-interface labels and public release were checked for VilaNet 1.0.10, but this complete procedure has not yet passed the physical HND-router evidence gate. Keep your router backup and a copy of the current package until that gate is complete.
Before you begin
You need:
- A router running Koolshare Merlin or Koolshare official-mod firmware with the Software Center (
rogsoft). - A router in the supported Broadcom HND package family.
- Administrator access to the router.
- A VilaVPN account with an active service.
- A computer or phone connected to that router.
This package does not support generic Asuswrt-Merlin without the Koolshare Software Center, stock ASUSWRT, legacy arm380 or arm384, QCA, MIPS, MIPSEL, or other Merlin package families. Do not upload the package if you cannot confirm both Koolshare rogsoft and HND support.
Back up the router first
- Open the router administration page.
- Use the firmware's backup or save-settings function to download a current router configuration backup.
- Store the backup somewhere other than the router.
- Keep a note of how to reach the router administration page without VilaNet running.
Do not proceed without a usable backup. Installing a router package temporarily stops an older VilaNet service if one is present, and any router-level network change can affect every device on the LAN.
1. Download the current package
Download this file without extracting it:
{% embed url="https://github.com/vilavpn/vilanet-merlin/releases/download/v1.0.10/vilanet-rogsoft-hnd-1.0.10.tar.gz" %}
Release page: VilaNet for Asuswrt-Merlin v1.0.10
Expected filename:
vilanet-rogsoft-hnd-1.0.10.tar.gz
Expected SHA-256:
019996031e87a99a6e6e95e7d0d3d4a107f844ed2806aba0052a47ff9160503b
You can also download the published SHA-256 file. If your device has a checksum tool, compare the downloaded archive with the value above before uploading it. Do not install a renamed, extracted or checksum-mismatched file.
2. Install through the Koolshare Software Center
Koolshare versions use slightly different wording, but the safe path is the Software Center's offline package upload.
- Stay connected to the router's LAN.
- Open the router administration page. This is commonly
http://router.asus.comor the router's LAN IP address. - Sign in as the router administrator.
- Open Software Center (软件中心).
- Open its Offline installation, Offline install or manual package-upload area.
- Select
vilanet-rogsoft-hnd-1.0.10.tar.gz. Do not extract the archive first. - Choose the Software Center action to upload and install it.
- Wait for the installation to finish. Do not refresh, reboot or close the page while the Software Center reports that installation is in progress.
- Return to the Software Center and confirm that VilaNet appears as an installed module.
The installer intentionally refuses to run if the required Koolshare package-center markers are absent or the router is outside the public HND release matrix. If it refuses, do not try to bypass the check or install the archive with generic Merlin instructions.
3. Open VilaNet and sign in
- In Software Center, select VilaNet.
- Confirm that the VilaNet page opens and shows these tabs: Overview, Account, Servers, Settings, Diagnostics and Maintenance.
- Open Account.
- Enter your VilaVPN account email and password.
- Select Login.
- Wait for the account state to confirm that you are signed in. Login can continue in the background on slower routers; do not repeatedly press Login while it is still working.
Your password field is used by the login action and is not a router-administrator password. Never put a real password into screenshots or support messages.
4. Keep automatic package and server selection
For the first connection, use the automatic choices and leave routing settings unchanged.
- Open Servers.
- If the catalogue has not loaded, select Refresh Catalogue.
- Under Package, select Auto package.
- Under Servers, select Auto server.
- Do not change Settings or the current routing mode before the first successful connection.
Automatic selection lets VilaNet choose an available service package and server for the account. After the first connection is verified, you can return to Servers and choose a specific location if needed.
5. Connect
- Open Overview.
- Select Connect.
- Wait for the page to report that the service is running and the connection is connected.
- Do not change routing mode while the first connection is starting.
If Connect is disabled, return to Account and confirm the login state, then return to Servers and select Refresh Catalogue.
6. Verify a LAN device is using the connection
Do not treat the button press alone as proof. Verify both the router state and a device behind the router.
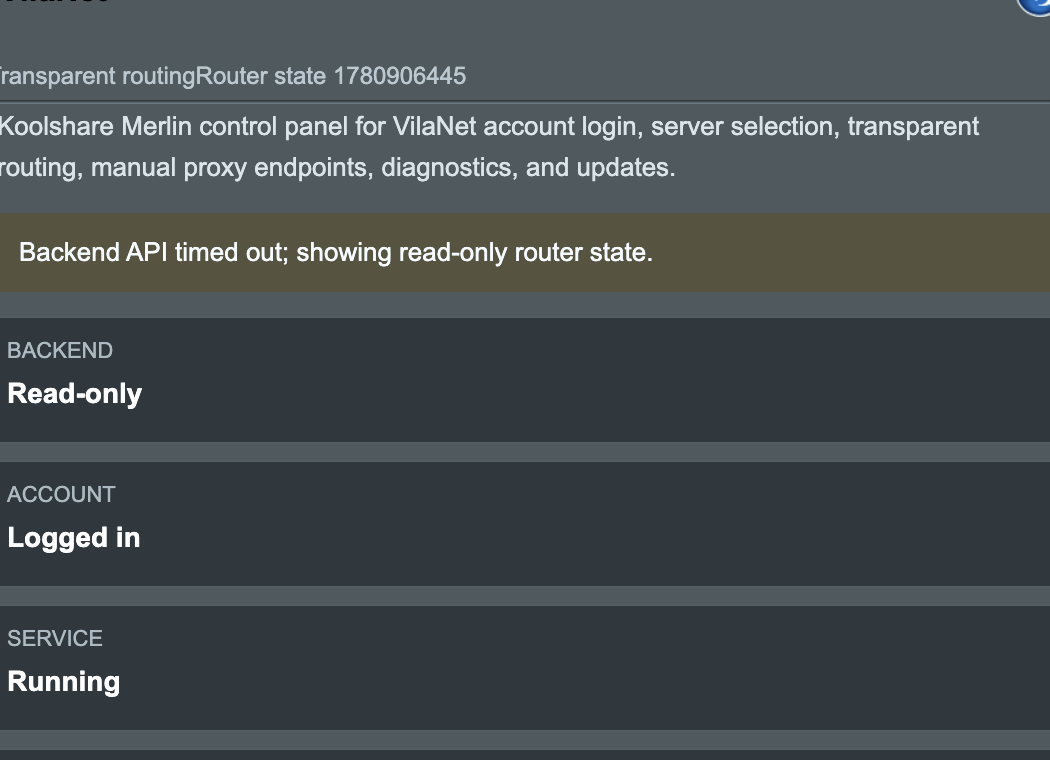
On the VilaNet Overview page, confirm:
- Backend is ready.
- Account is signed in.
- Service or Running shows a running state.
- Connection or Connected shows a connected state.
- No new error appears under Last Error.
Then use a phone or computer connected to the same router LAN:
- Turn off mobile data or any other VPN on that device so the test stays on the router's connection.
- Open a new browser window.
- Confirm that an ordinary website loads.
- Check the device's public IP using a reputable IP-check service.
- Compare it with the public IP seen before connecting. A changed public IP plus the connected router state is the minimum success evidence.
If only the router page says connected but LAN traffic does not work, treat the connection as unverified and follow the recovery steps below.
If installation or connection fails
VilaNet does not appear after installation
- Return to Software Center and confirm whether it reports VilaNet as installed.
- Hard-refresh the router administration page or sign out and back in.
- Confirm that the router really uses Koolshare
rogsoftBroadcom HND firmware. - Confirm that the uploaded filename and SHA-256 match this guide.
- If the module is still absent, stop. Do not use a generic shell installer or disable the platform checks.
Login does not complete
- Wait for the pending login to finish before trying again.
- Confirm the router's date, time and NTP settings are correct; a badly incorrect clock can break secure connections.
- Re-enter the account email and password once.
- If a previous version is installed, upgrade with the current 1.0.10 archive. This release fixes login requests that could appear as
Failed to fetchorERR_EMPTY_RESPONSEon slower routers.
The router reports connected but LAN devices cannot browse
- On Overview, select Disconnect.
- Confirm that ordinary internet access returns on a LAN device.
- Leave the routing mode at its original default; do not switch modes as a first recovery attempt.
- Open Diagnostics and note the visible error without exposing account details, public IPs, server identifiers or credentials.
- Return to Servers, refresh the catalogue and retry once with Auto package and Auto server.
- If it fails again, leave VilaNet disconnected and contact support with the app version, router model, firmware name and a redacted description of the error.
Safe reset, uninstall and recovery
Reset VilaNet settings
Use this when a bad VilaNet setting prevents a clean retry:
- Select Disconnect on Overview.
- Open Maintenance.
- Select Reset VilaNet Data and confirm the warning.
- Return to Account and confirm the account state.
- Repeat the automatic package/server and connection steps above.
Reset stops the VilaNet service and clears VilaNet connection and routing settings. It does not replace the router configuration backup you made before installation.
Uninstall without manually deleting files
- Select Disconnect on Overview.
- Return to the Koolshare Software Center.
- Find VilaNet and use the Software Center's uninstall action.
- Wait for uninstall to finish before rebooting or refreshing.
- Confirm that normal LAN internet access works.
The normal package uninstall is designed to remove VilaNet program files while preserving its stored account and settings for a future reinstall. If you are selling, returning or giving away the router, first use Logout on the Account tab, then Reset VilaNet Data, and only then uninstall VilaNet. Restore or factory-reset the router according to the router manufacturer's instructions before transferring ownership.
Reinstall the current package
If VilaNet files appear damaged but the router and Software Center still work:
- Disconnect and uninstall VilaNet through the Software Center.
- Reboot only if the Software Center or router firmware requires it.
- Verify the saved 1.0.10 archive checksum again.
- Repeat the offline installation steps with the same signed public package.
- Sign in, keep Auto package, Auto server and the initial routing default, then reconnect and repeat LAN verification.
If uninstall or recovery affects ordinary router internet access, stop making changes and restore the router configuration backup using the firmware's own recovery procedure.
Publication evidence still required
This page is review-ready text, not yet publish-ready evidence. Before removing the physical-verification notice, VilaVPN must capture and verify on a supported HND router:
- Offline Software Center upload and successful installation.
- Version 1.0.10 visible in the installed module.
- Account login with synthetic or fully redacted evidence.
- Auto package and Auto server selection.
- First connection without changing the default routing mode.
- Connected state plus real LAN round-trip/public-IP verification.
- Disconnect, reset, uninstall and clean recovery.
Was this page helpful?