How do I install and connect VilaNet on Apple TV?
Install the official VilaNet app from the App Store on Apple TV, use the on-screen keyboard to type your account email and password, tick the agreement and choose Sign In. Then open the Servers tab at the top, move the focus to the server you want and press Select — it connects on its own. Remote only, no phone needed.
VilaNet for Apple TV is a native tvOS app with Home, Servers and Settings sections. These instructions apply to version 1.2.9 (build 1) on tvOS 17 or later.
Allow some time: typing an email with the remote is slow. Set aside 2–3 minutes for the first sign-in.
The screenshots and recording on this page come from an official demo session marked FIXTURE, using a sample account and sample data (for example
Your IP: 192.0.2.1). The labels and steps match what you see on your own Apple TV; whether a tunnel is actually up is shown by the state on your own device.
Before you begin
You need:
- an Apple TV running tvOS 17 or later;
- an internet connection;
- an active VilaVPN subscription; and
- the email address and password for your VilaVPN account.
No account yet? The sign-in screen says so itself: "register on vilavpn.com to get started". You cannot register on the Apple TV — sign up and subscribe on your phone or computer first, then come back to the TV to sign in.
Never enter your VilaVPN password into an unofficial app or a website opened from an unexpected message.
1. Download VilaNet
- From the Apple TV Home Screen, open App Store.
- Select Search, then search for
VilaNet. - Open the official VilaNet listing and confirm that its name and branding match VilaVPN.
- Select Get or the download icon.
- Wait for installation to finish, then select Open.
The Apple TV App Store is the canonical installation source. If you cannot find VilaNet, first update tvOS under Settings > System > Software Updates and search again. Do not sideload a copy obtained from an unknown source.
2. Sign in
When VilaNet opens, the sign-in screen appears with the Email field already focused.
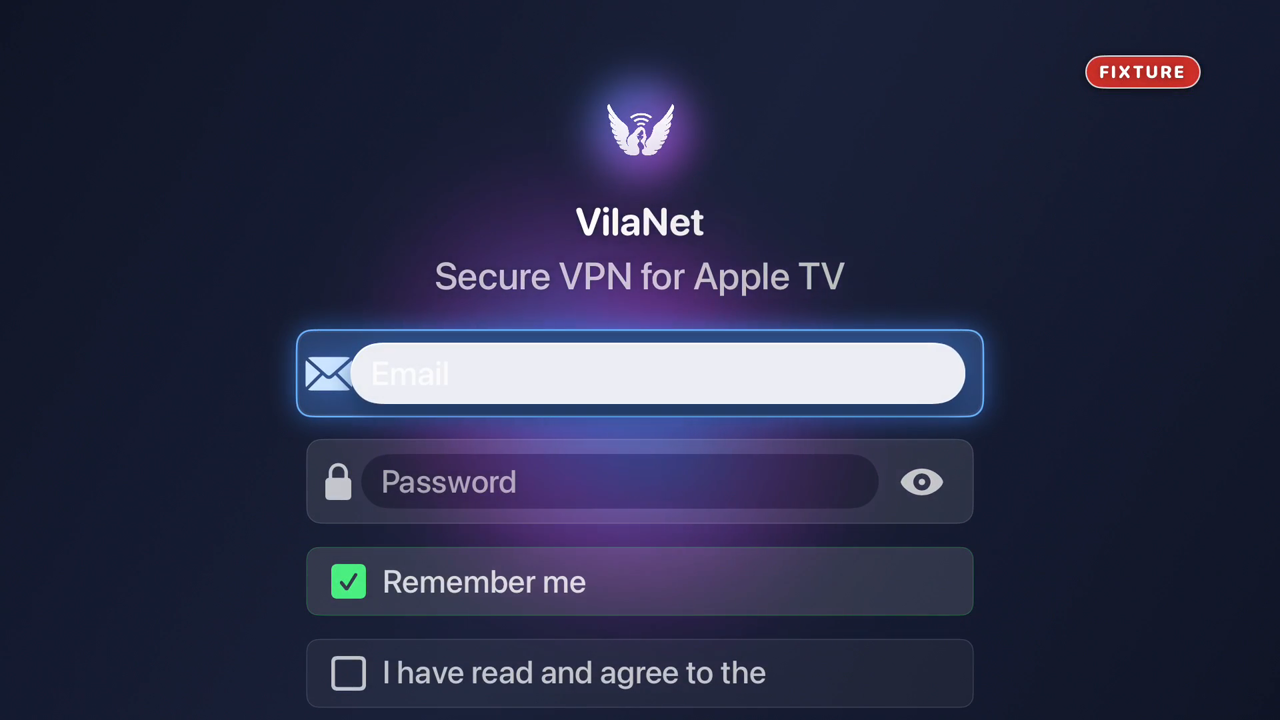
Enter your email. Press Select to open the on-screen keyboard. Move across the key grid with the directional pad and press Select for each character. Letters are on the top row; numbers and symbols — including
@and.— are on the row below. TheABC/abc/#+=buttons under the grid switch between uppercase, lowercase and symbols. Press MENU when you are done to put the keyboard away.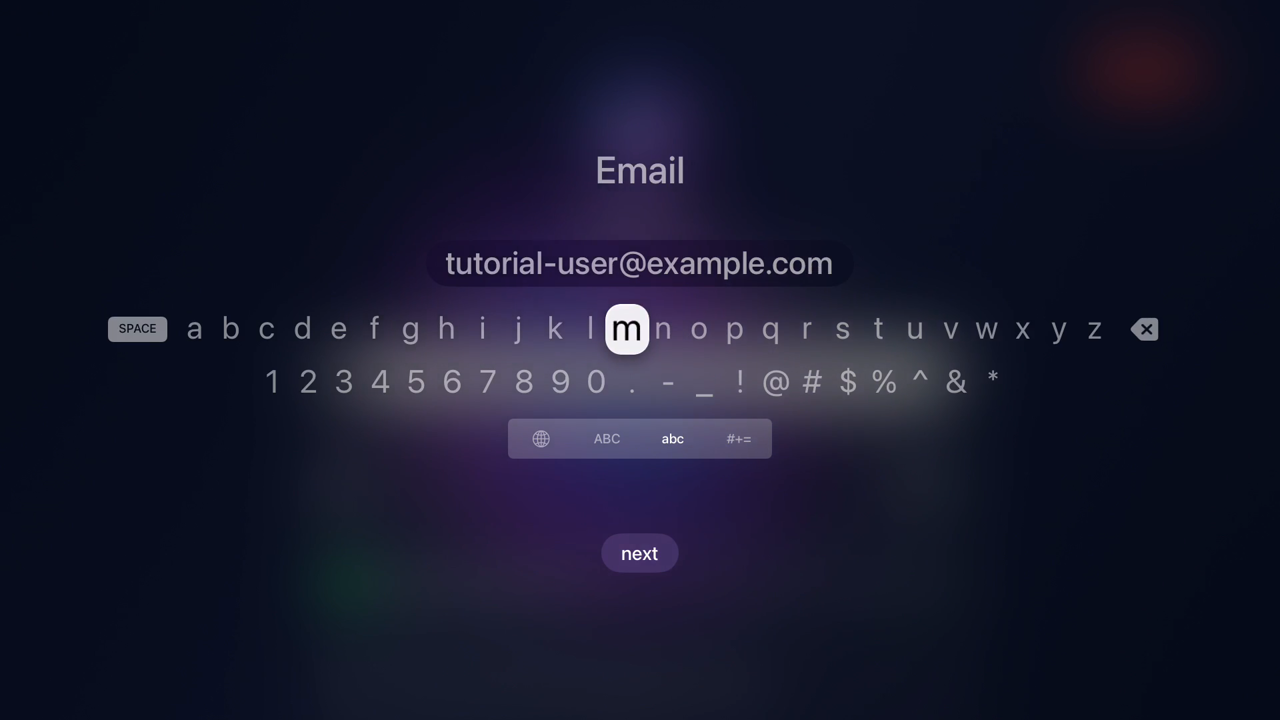
Enter your password. Move down to Password and type it the same way; it appears as dots.
Agree to the terms. Move down again to I have read and agree to the (with Terms of Service and Privacy Policy links beneath it) and press Select to tick it. Only then does the Sign In button become available.
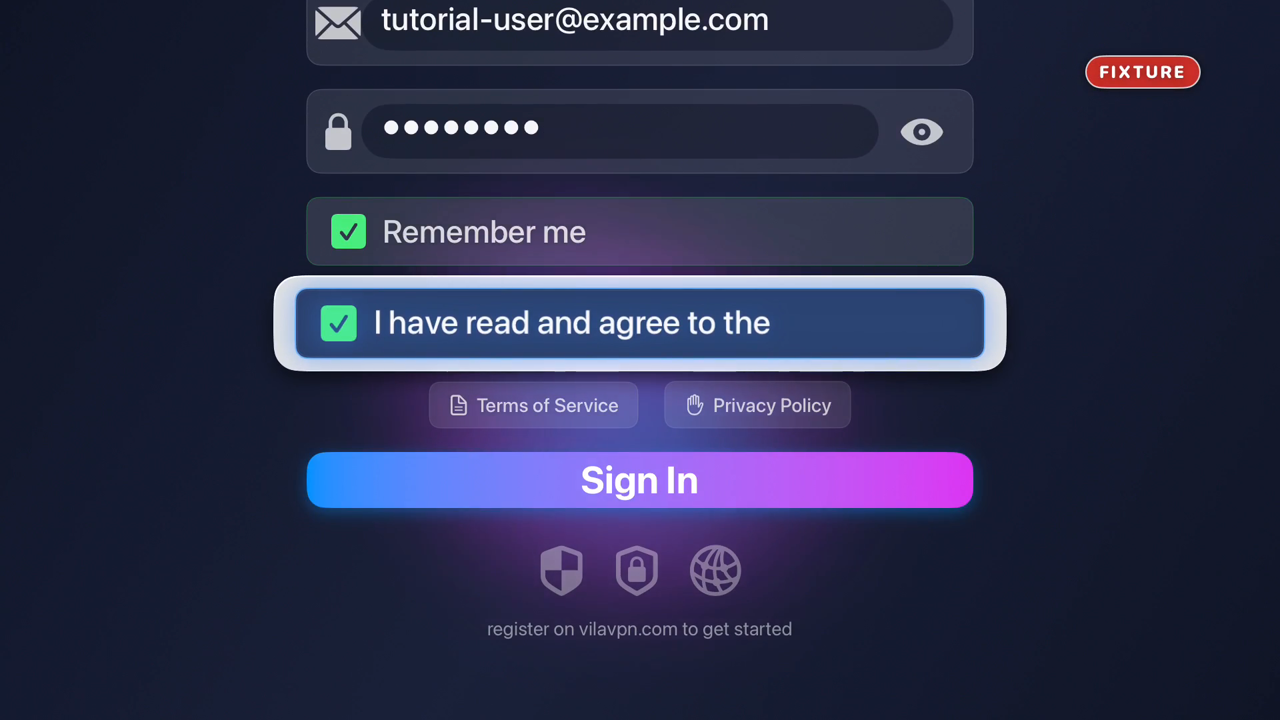
Select Sign In.
Sign-in success check
You land on Home, which shows the status Disconnected, Your IP, the PAC Mode / Global Mode switch, Tap to select server and a green Connect button. You can move between Home, Servers and Settings.
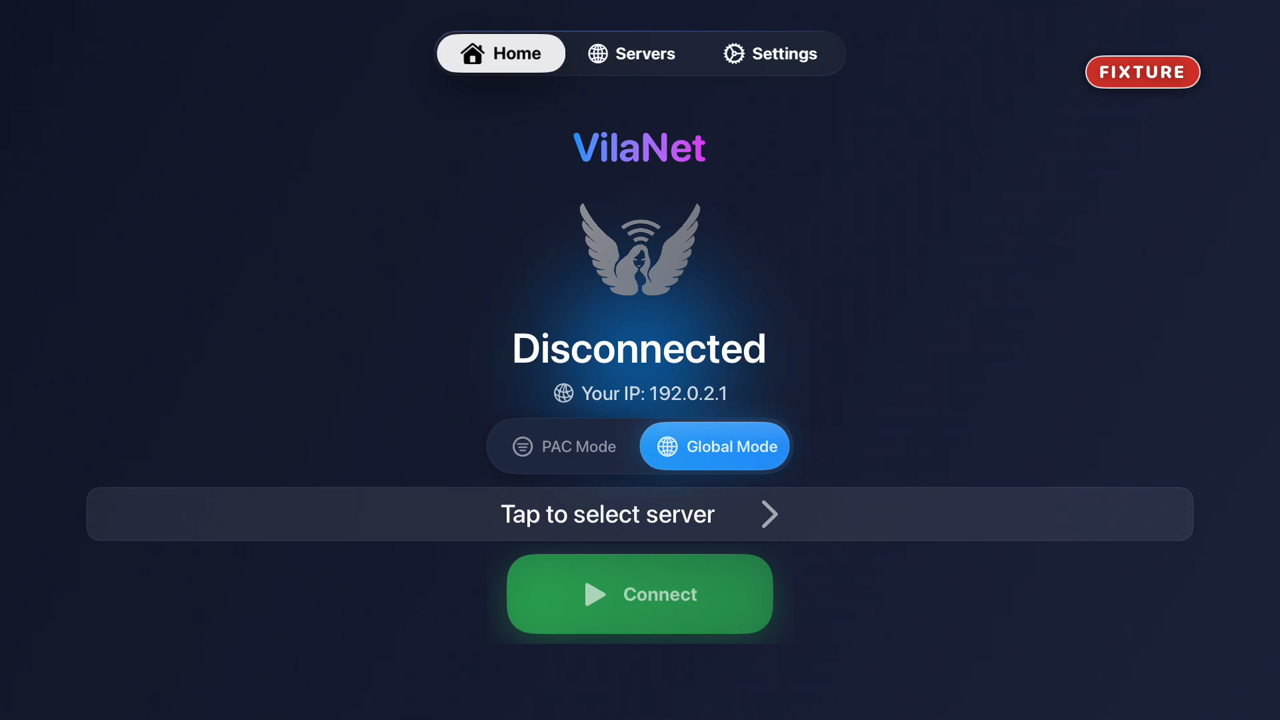
If VilaNet reports that the package is expired or inactive, renew the subscription at vilavpn.com before trying to connect.
3. Choose a server and connect
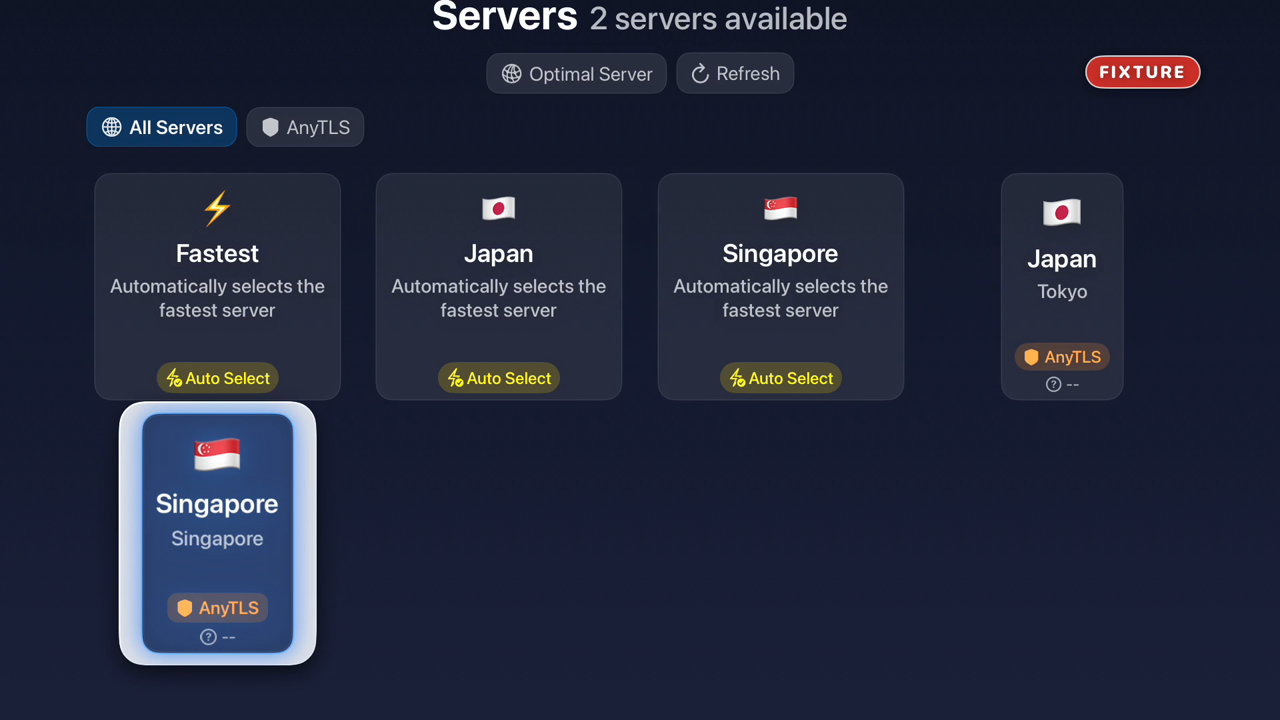
Open Servers. Press Up to move the focus to the tab bar at the top, move right to Servers and press Select. The heading shows how many servers you have — for example 2 servers available — along with Optimal Server, Refresh and the All Servers / AnyTLS filter.
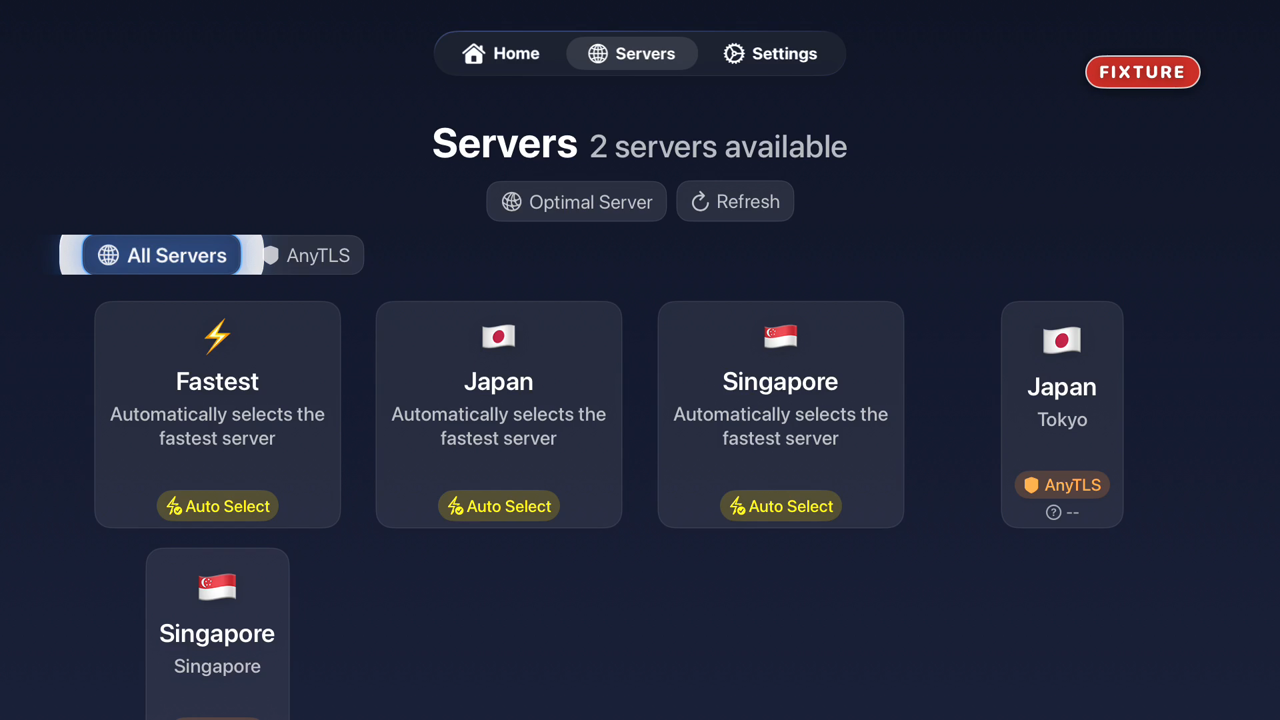
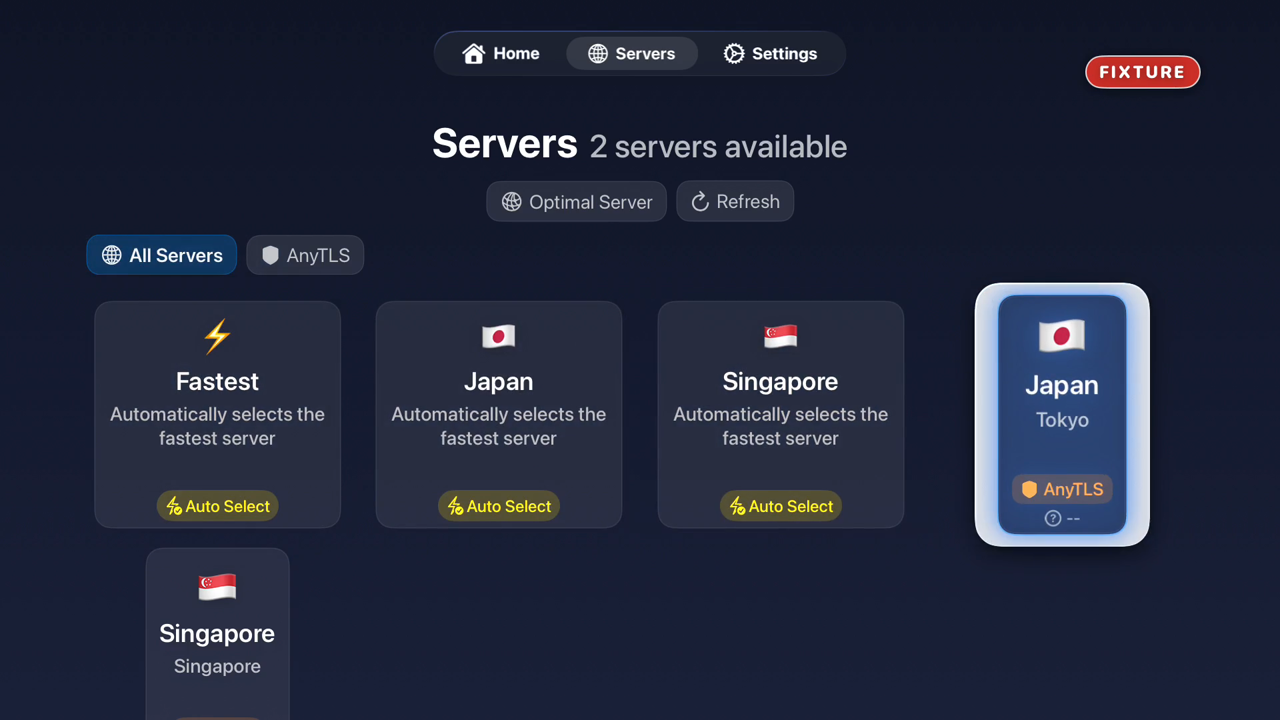
Pick a server. Move through the grid with the directional pad; the focused card enlarges, fills solid blue and gains a white outline. The first cards — Fastest, and one per region — are Auto Select entries that pick the lowest-latency server for you.
Press Select to connect. VilaNet connects on its own, and a green Connected badge appears on the card, above the protocol tag.
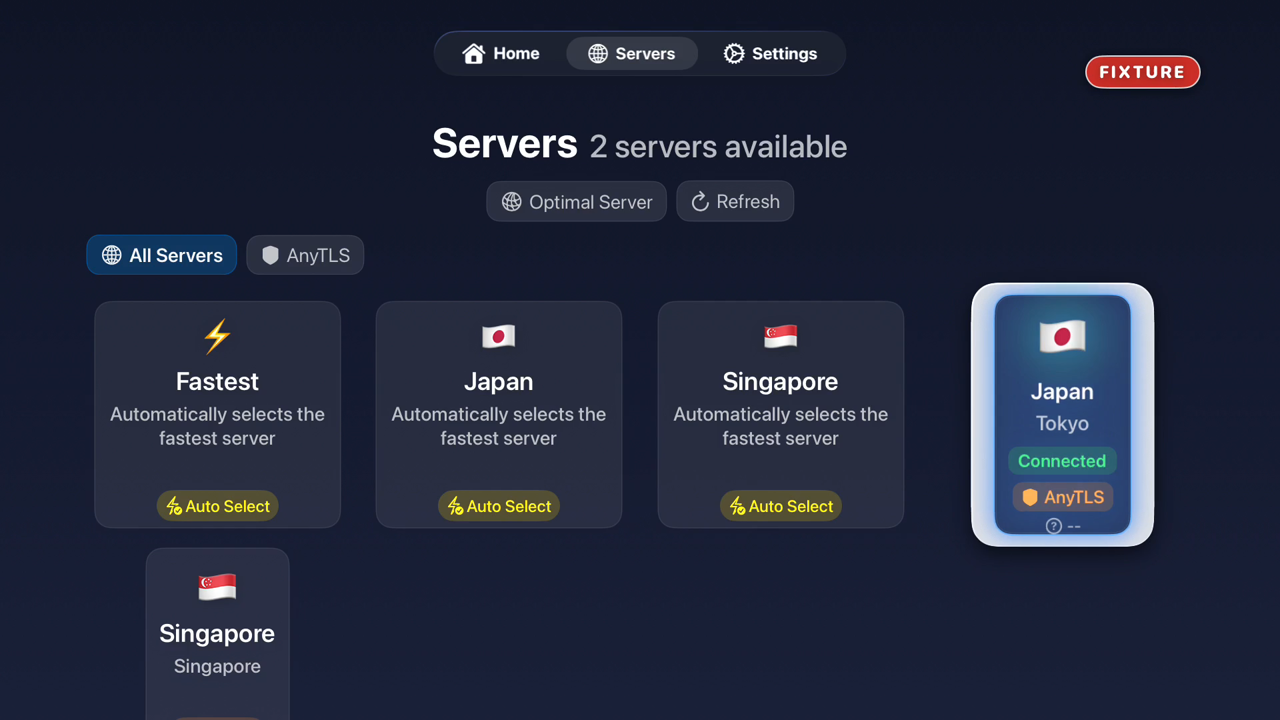
There is no VPN permission prompt. Unlike iPhone, iPad and Mac, tvOS has no VPN consent dialog — no system prompt appears on Apple TV for you to allow. VilaNet configures its tunnel by itself; pressing Select is all you do. If you are waiting for an approval prompt, it is not coming — look for the green Connected badge on the card instead.
Selecting a server initiates the connection; you do not need to paste a subscription URL into VilaNet.
If your account holds more than one package: pick the matching package on the Servers page first, and that package's servers appear in the list.
Confirm that it worked
- A green Connected badge appears on the card of the server you chose. This is the only reliable signal.
- ⚠️ Do not judge by the blue fill. Blue plus a white outline only means the card is selected/focused (the remote is pointing at it), and it appears on unconnected cards too. The screenshots in steps 2 and 3 above are the very same card, first only selected and then actually connected.
- Back on Home, the status line changes from Disconnected to Connected.
- Apps you open afterwards, streaming included, go out through the VPN.
Switch servers or disconnect
Switch servers: just select a different card and press Select — there is no need to disconnect first. The old server loses its Connected badge and the new one gains it.
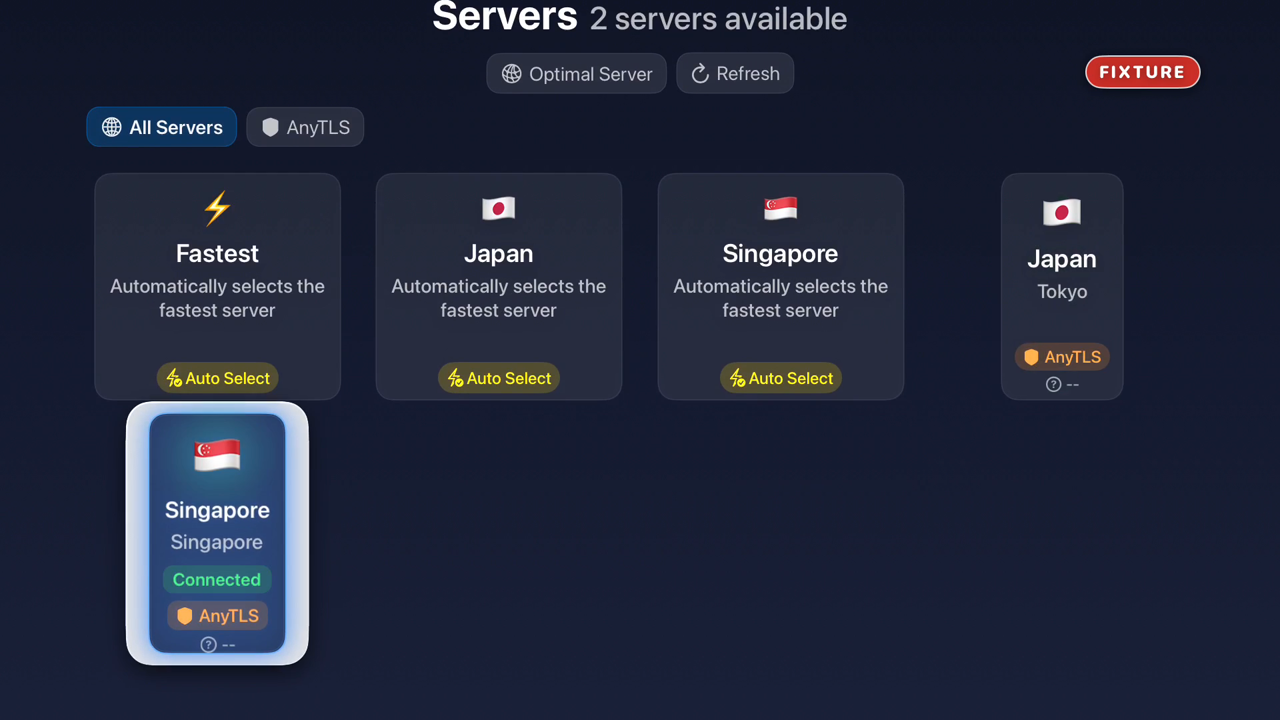
Disconnect: press Select again on the server you are currently connected to; the green Connected badge disappears and the card stays selected. You can also go back to Home, where the button reads Disconnect.
Once you are disconnected, no card on the Servers page carries a Connected badge.
Use Settings for the app's available preferences and support information.
If you cannot install, sign in or connect
- The app is missing from search: confirm that tvOS is version 17 or later and that the Apple ID's App Store region can access VilaNet.
- Remote focus appears stuck: press Menu/Back once, return to the screen and move focus again. Do not repeatedly submit the sign-in form.
- "Login Failed": the email or password is wrong. Remember that the on-screen
keyboard starts in lowercase; use
ABC/abcto switch case. - "Login timed out. Please check your network connection and try again.": the Apple TV's network is down or unstable. Check the connection and try again.
- "No packages available": you signed in, but the account has no active package — usually an expired subscription. Renew at vilavpn.com, then choose Refresh on the Servers page (there is no pull-to-refresh on TV — use the Refresh button).
- "No servers found" / "Failed to load servers": the server list could not be fetched. Choose Refresh and try again.
- "Connection failed": that server is not reachable right now; pick a different card in the grid. If several fail, contact support and include the server name.
- "VPN permission is required to establish a connection": VilaNet could not create its own VPN configuration on this Apple TV. This is not a system prompt you declined — tvOS shows no VPN consent dialog. Quit and reopen VilaNet, then connect again. If it persists, restart the Apple TV or reinstall VilaNet, and give support the exact text.
- It connects but content does not load: disconnect, select a different server and connect again. Then continue to Connected but no internet.
- It still cannot connect: continue to Cannot connect.
When contacting support, include the Apple TV model, tvOS version, VilaNet version and the exact error text. Never send your password.
Next step
Want it on your phone or computer? See the iOS, Android, macOS or Windows guide.
Was this page helpful?